Translate

Tuesday, July 5, 2016

Blueprint for Protective Skin for iBook G3 Clamshell

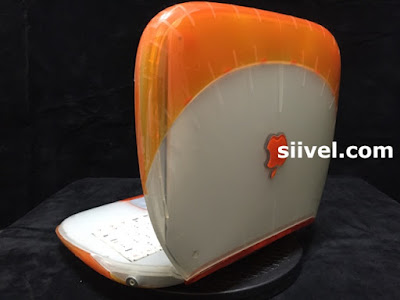
Applying a layer of protective skin not only provides greater protection for iBook Clamshell, but also make it gloss like new.


Bestskinsever on iBook G3 Clamshell Tangerine


Another View of the iBook G3 Clamshell Skin

Is the protective skin cool? You can also DIY yours!

To customized this skin, we strongly suggest you to buy the Bestskinsever protective film. The "DIY Cut to Fit Blank Glossy Skin (12x24") is US$28.99. 2 pieces are required.

Bestskinsever Skin for iBooks Cover


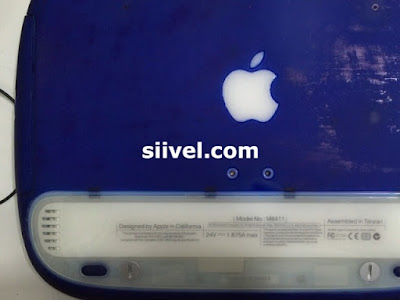
Bestskinsever Skin for iBook Bottom Cover
 

Erik Siivel (@siivel.com)
Modder | Producer | Blogger | Youtuber
Email: siiveldotcom@gmail.com

Tuesday, April 19, 2016

Studio Display Mod - Finalized

Despite the revolution of LCD technology bring about production of HD monitors with 4K or even 5K resolutions, some people still concern not only the screen quality per se but also the overall design of a monitor (like me XD). This is one of the articles about modifying an obseleted Apple Studio Display 17" (ADC) to meet present use.

After plugging the ADC connector of the Studio Display with the ADC to DVI Adapter, the LCD screen exhibited severe electromagnetic interference...


Electromagnetic Interference on Modified Studio Display
 Electromagnetic Interference on Modified Studio Display

Which meant that image quality will be adversely affected unless the whole ADC cable is rebuild.

Therefore, I switched to the "Plan B": simply split the ADC into 3 separate cords: power, USB and HDMI. 

After switched to "Plan B", the problem of electromagnetic interference was resolved.

Some pictures were captured after finalizing the mod:


Studio Display Mod Finalized Being Plugged with Mac Mini Early 2014


Top View of Studio Display Mod


Interior Enclosure of Studio Display Mod


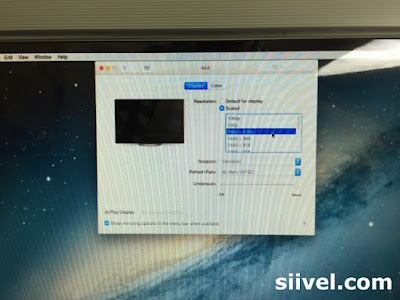
The Optimal Resolution of the Modified Studio Display is 1600x1200

The mod is completed here. The finalized product is cool. The retention of the "dummy" CRT tube and the deflection board in the rear enclosure makes the whole display looked "original", but now it is being plugged with a Mac Mini early 2014 running Mac OS X Yosemite!


Erik Siivel (@siivel.com)
Modder | Producer | Blogger | Youtuber
Email: siiveldotcom@gmail.com


Monday, April 18, 2016

Fixing Discolouration of iBook Clamshell

Last Article:

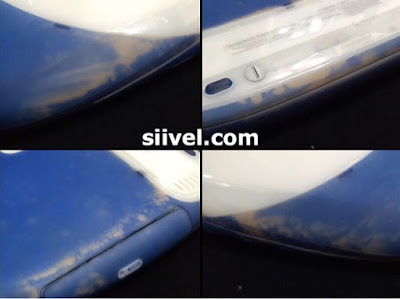
Discolouration is a very common phenomena for iBook G3 Clamshell. Yet it is quite unusual that there are almost no article mentions about this in google, not to mention any remedy solution.

In my last article, I shown an Indigo Clamshell with plenty of white marks scatter over the rubber parts. It is frustrating to see a vintage Mac which is still fully functional but has such a poor cosmetic condition. So I decided to find a way to fix it.

Discolouration of iBook Clamshell

I thought that painting, perhaps, the best solution. After several attempts, I found that the permanent ink by "Shiny" done the job satisfactorily.

Shiny Permanent ink to Fix iClam Discolouration
Shiny Blue Permanent Ink

Here were the photos taken after the paint work...
 iBook Clamshell After Repaint
iBook Clamshell After Repaint

 iBook Clamshell After Repaint
iBook Clamshell After Repaint

 iBook Clamshell After Repaint
iBook Clamshell After Repaint

 iBook Clamshell After Repaint
iBook Clamshell After Repaint

After the paint work, I applied a layer of protective film onto the shell. Wow, it is totally amazing, isn't it?


There is a video about the work:


Erik Siivel (@siivel.com)
Modder | Producer | Blogger | Youtuber
Email: siiveldotcom@gmail.com

Thursday, March 17, 2016

Various VGA Signal Timings for SwitchResX Configuration

The following table is showing the VGA timings for different screen resolutions.

VGA Timing Signals for different screen resolutions
VGA Timing Signals for Different Screen Resolutions

Erik Siivel (@siivel.com)
Modder | Producer | Blogger | Youtuber
Email: siiveldotcom@gmail.com

Wednesday, February 17, 2016

iBook G3 Clamshell Mod - Install 1400x1050 Pixels HD LCD

This is one of the passages about the iBook G3 Clamshell modification project, of which a logicboard of Intel i5 was being installed into the classic Apple iBook G3 Laptop.

We start this project in 2014. We finished it in April 2015. A video about this project was uploaded onto Youtube. And I have been using it for almost a year.

Actually, I am very satisfied with its performance:

The i5 CPU is fast. The system is very quiet, stable and smooth, even if being upgraded to Mac OS X El Capitan.

Temperature of CPU is around 50 degree celsius all time.

The design of iBook Clamshell is the most elegant laptop ever. The idea of inclusion of a handle is great. I like carry the iBook with the handle. No pouch or cover is ever needed.

I applied a layer of protective film onto the shell. The skin protects the laptop and is still adhere firmly after a year. There is no need to buy any cover for it.

It is amazing to use a classic laptop like this, perform contemporary tasks effectively after 16 year of its first issue.

However, honestly speaking, there are some limitations to the modified iBook.

First, the screen resolution is limited to 1024 by 768 pixels. Which is a very low technology in these days.

Secondly, the battery life is about 3.5 to 4 hours after fully charged. I am not satisfied with this. I will try to find out if this is caused by too many application being used at the same time.

Recently, the iBook's LCD screen was replaced, by an aviation-graded 12" HD LCD with resolution 1400x1050 pixels.


Upgrade the LCD of iBook to 1400x1050
Upgrading the LCD of iBook Clamshell to 1400x1050


After the replacement, the System Preferences Window becomes smaller. Now the display can show more information; and it will be more meaningful to use the multi-tasking of Mac OS X El Capitan.


The resolution of 13" Macbook Air 2015
The Screen Resolutions of Macbook Air is 1440x900


In Apple's official site, it is declared that the resolutions of 13" MBA is 1440x900 whereas 11" is 1366x768. Now we have more pixels but in a smaller panel!

Erik Siivel (@siivel.com)
Modder | Producer | Blogger | Youtuber
Email: siiveldotcom@gmail.com


Wednesday, February 3, 2016

Tearing Off the Rubber Layering of iBook Clamshell

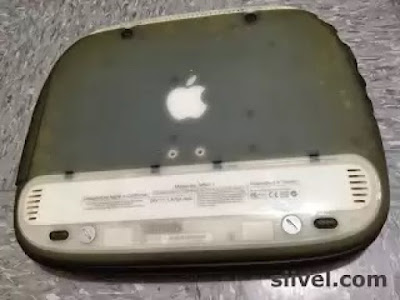
Thanks to a mixture of plastic and rubber casing, the iBook Clamshell is extra-ordinary tough against shocks. The rubber layering, however, is very easy to have marks appeared on it.


Tear Off the Rubber Layering of iBook Clamshell

What is the nature of those marks?

Today I tried to tear off this rubber layering from the iBook to check the nature of those marks: are they remain inside the rubber? Or between the rubber layer and the plastic shell? 

I have a damaged graphite case for this experiments.


Tear Off the Rubber Layering of iBook Clamshell

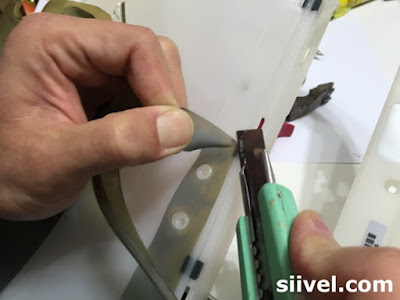
I started from a cut made by the cutter. And then I tore the plastic off with force.


Tear Off the Rubber Layering of iBook Clamshell

The plastic attached firmly with the plastic shell. Huge amount of force was used. It is therefore unlikely that those mark are dirts penetrated between the rubber layering and the plastic shell.

Tear Off the Rubber Layering of iBook Clamshell

There are 4 knots close to the battery door. It could not be tore off without the aid of a cutter.

Tear Off the Rubber Layering of iBook Clamshell

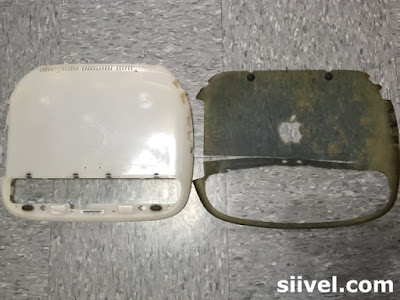
Finally, I took apart the rubber layer from the plastic case. The plastic shell is still remaining clean. I conclude that those are not dirt, instead, discolour which could not be eliminated by water, detergent or alcohol. 

Tear Off the Rubber Layering of iBook Clamshell

So, if your iBook Clam has marks appear.  Do not try to clean it because it could not help. It is better to have a replacement instead.

Erik Siivel (@siivel.com)
Modder | Producer | Blogger | Youtuber
Email: siiveldotcom@gmail.com

Tuesday, February 2, 2016

How to Remove Scratches on Your Macintosh?

Every Macintosh is piece of Art. When a person chooses to buy a Macintosh, normally s/he takes into account the design or outlook in the buying decision. The good experience of using it not only comes from the specs but also the cool designs of the machines.

It will be great if it could always maintain a gloss outlook as newly purchased. Unfortunately, sometimes, we may make scratches out of accidents. If there is such a case, polishing it will "cure". 

Polish the case of vintage Macintoshes like iMac, iBook or Macbook is not difficult at all. All you need are the right materials and patient.

Please bear in mind that not all Macintoshes require polishing. The tutorial here does not apply to those with a factory made rough surface (like the Classic, Or Apple II) and those with a metal case (like Macbook Air or Macbook Pro).

There are several materials I usually use to remove scratches, the choice depends on the deepness of the scratches. The following passage will start from the ones with the strongest abrasive power:

(1) Sand Paper: it is used to abrase severe marks on the plastic case. You may apply water during the work.
Sand Paper
(2) Polish Notion: the one with a red bottle has particles of 3 mini-metres whereas the one with the yellow bottle has smaller particles of about 1 mini-metre. When your Mac has light scratches, it is better to skip the sand paper and use the red bottle instead. The yellow one is normally used to make a gloss surface after removal of scratches.

Polish Notion

(3) Tamiya Polishing Compound: I use it when all the scratches are removed. It provides a perfectly smooth and glossy finish.

Tamiya Polishing Compound

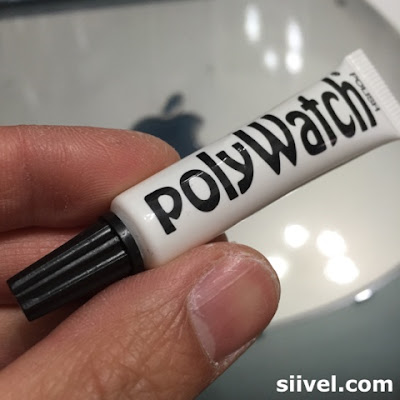
(4) Poly Watch: I use it in the very final stage. It makes a even more glossy effect compare with the Tamiya Compound. But it is extremely expensive.

Poly Watch

How to Polish?

First you need to access the severeness of your scratch, if the scratch is mild, you may skip the sand paper and use polish notion directly. I rarely use Tamiya Compound or Poly Watch in the very beginning.

And then applies the polish notion onto a soft cloth (I prefer cloths being cut from an old T-shirt), and rub the scratch by making small circles. For a normal scratch I usually rub thousands of times, it might takes several weeks to clear a mark. So the clue is "patient". 

Erik Siivel (@siivel.com)
Modder | Producer | Blogger | Youtuber
Email: siiveldotcom@gmail.com