Translate

Showing posts with label Studio CRT 17 Display (ADC). Show all posts

Sunday, December 20, 2015

Studio Display Mod - Protective Film for the Display

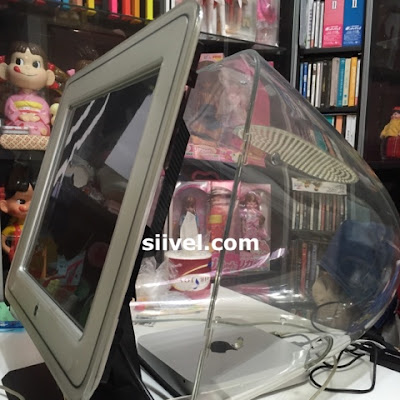
Despite the revolution of LCD technology bring about production of HD monitors with 4K or even 5K resolutions, some people still concern not only the screen quality per se but also the overall design of a monitor (like me XD). This is one of the articles about modifying an obseleted Apple Studio Display 17" (ADC) to meet present use.
The Studio Display is heavy. It is about 45.8 lb (21 kg). The whole weight of the display is being sustaied by the stand. To make it worst, as the monitor is already a very old item, there will be some depreciation, degrading or weakening of the structure, including the stand. Therefore, whether it is still fit to hold the CRT is in doubt. In fact, my original Studio Display has been broken at the stand.

After the modification, the display will be much lighter, as the CRT will be removed. However, it is still a good idea to strengthen the structure of the stand to prevent it from damage and extend its lifespan.

DIY Protective Skin for Apple Studio Display
Making a Protective Skin for the Stand


We have initiated a number of proposals, but finally, we found that applying Bestskinsever protective skin on the stand of the Studio Display appears to be the best solution.


DIY Protective Skin for Apple Studio Display
Finished! (Front View)

DIY Protective Skin for Apple Studio Display
Finished! (Rear View)

DIY Protective Skin for Apple Studio Display
The Bestskinsever Skins on the Display Stand is Hardly Noticed


The on scale blueprint will be uploaded in another passage, you may need it if you have this monitor, even if you don't mod it.

DIY Protective Skin for Apple Studio Display

Tuesday, December 8, 2015

Studio Display Mod - Polishing the Case

Despite the revolution of LCD technology bring about production of HD monitors with 4K or even 5K resolutions, some people still concern not only the screen quality per se but also the overall design of a monitor (like me XD). This is one of the articles about modifying an obseleted Apple Studio Display 17" (ADC) to meet present use.
Polishing the shell is one of the most important step of our current Studio Display modification project as our goal is to give a junk Mac a new life. "A new life" not only limited to the innards spec but also to the outlook.


Scratches on the Mac
There were Many Scratches over the Case of Studio Display


Used Macs always unavoidably have the surface scratched in varying degrees. By rubbing the case with liquid polish, we remove the scratches and creat a smooth and shiny surface.


Dents on the Mac
Dents on the Studio Display


For the Studio Display I am modifying, as it was originally an inoperative junk item, or perhaps a trash-picked item :), there are hundreds of scratches on the shell, some areas even have dents thus even polish is no use (sad). But we still try our best to renovate it.

We first use some Tamiya sand papers to rub the heavy scratch, then by liquid polish 3000 (particle size about 3 micrometres) followed by 9800 (particle size about 1 micrometre). Now most of the scratches has been removed.

Mac After Being Polished
Studio Display - After Being Polished

Thursday, November 26, 2015

Studio Display Mod - Take Apart the CRT

Despite the revolution of LCD technology bring about production of HD monitors with 4K or even 5K resolutions, some people still concern not only the screen quality per se but also the overall design of a monitor (like me XD). This is one of the articles about modifying an obseleted Apple Studio Display 17" (ADC) to meet present use.
Here's a Service Source of the Apple Studio 17 Display (ADC). After reading that, you will be able to disassemble your Studio Display:

http://tim.id.au/laptops/apple/displays/studio17adc.pdf

After disassembled the Display, you will have the following stuffs:

(a) the Outer Case - comprising of the front bezel, the rear housing and the stand;
(b) the deflection board; and
(c) the CRT.

Among these, the CRT is our subject matter which needs to be replaced by a LCD.

However, the CRT has leaded glass and poisoning substances inside. So when you take apart of it you need to pay special attention. Remember not to break the glass or you might be exposed to those poisoning substances therein. After take apart the CRT, hand over to e-scarp porofessionals for handling. 

After disassemble the display, I applied glue between the front bezel and a 16" LCD.

Modifying Apple Studio CDT Display (ADC)
Mac OSX Yosemite Shown Up in Apple Studio CRT Display (ADC)

Is that a good idea to modify the display this way?


Modifying Apple Studio CDT Display (ADC)
The CRT was being replaced by a 16" LCD Panel

I think it is amazing to see an Apple Studio CRT Display (ADC) works with a Mac Mini.

It is just the beginning. Please stay tuned to this blog:)