Despite the revolution of LCD technology bring about production of HD monitors with 4K or even 5K resolutions, some people still concern not only the screen quality per se but also the overall design of a monitor (like me XD). This is one of the articles about modifying an obseleted Apple Studio Display 17" (ADC) to meet present use.
The Studio Display is heavy. It is about 45.8 lb (21 kg). The whole weight of the display is being sustaied by the stand. To make it worst, as the monitor is already a very old item, there will be some depreciation, degrading or weakening of the structure, including the stand. Therefore, whether it is still fit to hold the CRT is in doubt. In fact, my original Studio Display has been broken at the stand.
After the modification, the display will be much lighter, as the CRT will be removed. However, it is still a good idea to strengthen the structure of the stand to prevent it from damage and extend its lifespan.

 |
| Making a Protective Skin for the Stand |
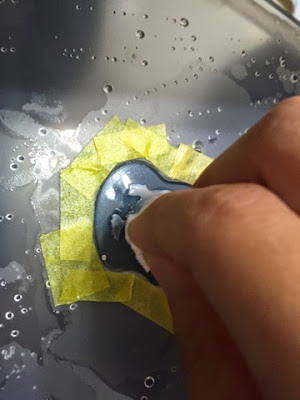
We have initiated a number of proposals, but finally, we found that applying Bestskinsever protective skin on the stand of the Studio Display appears to be the best solution.
 |
| Finished! (Front View) |
 |
| Finished! (Rear View) |
 |
| The Bestskinsever Skins on the Display Stand is Hardly Noticed |
The on scale blueprint will be uploaded in another passage, you may need it if you have this monitor, even if you don't mod it.

Related Articles:
Studio Display Mod - What is "Apple Studio Display"?
Studio Display Mod - An Idea
Studio Display Mod - About ADC Connection
Studio Display Mod - Take Apart the CRT
Studio Display Mod - Polishing the Case
Studio Display Mod - Protective Film for the Display
Studio Display Mod - Blueprint of Protective Skin
Studio Display Mod - Take Apart the CRT
Studio Display Mod - Duplicating the Cathode Ray Tube
Studio Display Mod - Assembled
Studio Display Mod - Finalized
Erik Siivel (@siivel.com)
Studio Display Mod - What is "Apple Studio Display"?
Studio Display Mod - An Idea
Studio Display Mod - About ADC Connection
Studio Display Mod - Take Apart the CRT
Studio Display Mod - Polishing the Case
Studio Display Mod - Protective Film for the Display
Studio Display Mod - Blueprint of Protective Skin
Studio Display Mod - Take Apart the CRT
Studio Display Mod - Duplicating the Cathode Ray Tube
Studio Display Mod - Assembled
Studio Display Mod - Finalized
Erik Siivel (@siivel.com)
Modder | Producer | Blogger | Youtuber
Email: siiveldotcom@gmail.com