Translate

Saturday, January 30, 2016

(Retro Computing) How to Install Mac OS X 10.4 (Tiger)

Mac OS X 10.4 Tiger Installer Disc

Apple Mac OS X 10.4 (Tiger) was released to the public on 29 Apr 2005 for US$129.95 as the successor to Panther.

Tiger, imho, is the one of the most popular OS X ever released by Apple because it could be run on a large variety of vintage Macs.

To use Mac OS X 10.4 Tiger, your Macintosh needs:

(1) PowerPC G3, G4, or G5 processor;

(2) Built-in FireWire;

(3) At least 256 MB of RAM (128 MB could still run it unofficially);

(4) DVD drive (DVD-ROM), Combo (CD-RW/DVD-ROM) or SuperDrive (DVD-R) for installation;

(5) At least 3 GB of free disk space; 4 GB if you install the XCode 2 Developer Tools;

Now let begin the installation!

After you insert the installer disc into the CD rom, press "C" button snd "power" button simultaneously until you see the apple logo on grey background.

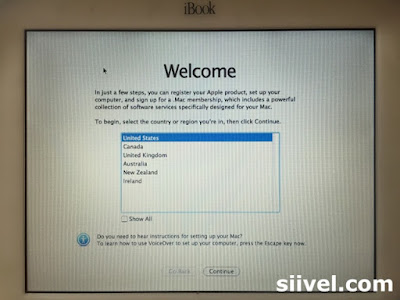
Mac OSX 10.4 Tiger Installation

Then a screen appears ask you to select the language of the OS you are going to install. After choosing your language, click the blur button at the lower right-handed corner.

Mac OSX 10.4 Tiger Installation

The next page is the welcome message, just click "Continue" to skip.

Mac OSX 10.4 Tiger Installation

Next, you need to agree to the licence agreement before proceeding further.

Mac OSX 10.4 Tiger Installation

Before selecting a destination for the installation, I suggest you to click the "Option" icon. You will be asked to choose among the followings:

(1) Upgrade the OSX;

(2) Archieve and install;

(3) Erase and install.

I picked "Erase and install" in this tutorial.

Mac OSX 10.4 Tiger Installation

Mac OSX 10.4 Tiger Installation

Your Mac will check your installation DVD before installing the OS (this step takes about 17 minutes).

Mac OSX 10.4 Tiger Installation

And the installation takes about another 55 minutes.

Mac OSX 10.4 Tiger Installation

When installation finishes, the system will restart automatically in 30 seconds.

Mac OSX 10.4 Tiger Installation

Installation finished! It took me 1 hour 24 minutes for the whole installation.

Mac OSX 10.4 Tiger Installation

Hope this help!

Erik Siivel (@siivel.com)
Modder | Producer | Blogger | Youtuber
Email: siiveldotcom@gmail.com

Discolouration of iBook Clamshell

Yesterday I conducted annual check of the iBook clamshells I have collected.

What I have done for the check up:

(1) a physical inspection: checked their outlooks, took photos. Any oxidation? discolouration? any deterioration in physical condition, when comparing with the record last year?

(2) a hardware test: plug and power on the unit, check the LCD, keyboard, trackpad, back light, AC connection, battery and so on...

(3) protective measures: such as replacement of dessicant, rewarping and repacking the units...

(4) maintain proper record after implementation of those work.

IBook Clamshell Collection

iBook Clamshells with Original Boxes

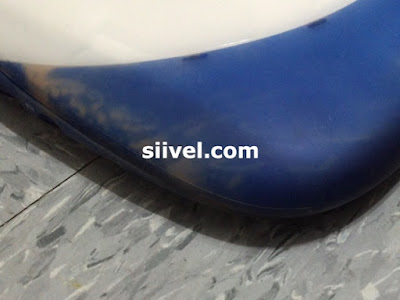
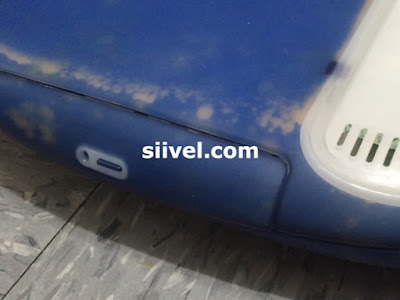
I noted the one of the iBook, which is of indigo colour, has been seriously discoloured. I don't know why. I checked its photos which were being taken last year. Those discolouration didn't exist at all.

Discolouration of iBook Clamshell

Those discolouration concentrates at the rubber part of the iBook.

Discolouration of iBook Clamshell

The indigo colour has fated into white colour.

Discolouration of iBook Clamshell

Those discolouration scatter over that iBook.

Discolouration of iBook Clamshell

Luckly, other iBooks were not affected.

Discolouration of iBook Clamshell

I googled this syntom but in vain. It appears that no one has talk about this before.

It made me frustrated because I have no clue or idea to prevent it from happening again.

If you had any idea. Kindly share m(_ _)m I really appreciate that.

Erik Siivel (@siivel.com)
Modder | Producer | Blogger | Youtuber
Email: siiveldotcom@gmail.com

Sunday, January 24, 2016

Studio Display Mod - Assembled

Despite the revolution of LCD technology bring about production of HD monitors with 4K or even 5K resolutions, some people still concern not only the screen quality per se but also the overall design of a monitor (like me XD). This is one of the articles about modifying an obseleted Apple Studio Display 17" (ADC) to meet present use.
There are at least 2 ways to modify the Studio Display: the easier way is to migrate the original LCD circuit board into the studio display. But I dislike this idea not only because there will be 2 lines out (the power cord and the DVI/VGA cord), but also this sacrifices the functions of USB at the right side of the monitor.

Therefore, I adapted another way: cobined the signal, the USB and the power cords into one ADC cord. Then there will be one ADC line out. It would be terrific! However, this associates more scoldering work and higher cost as I need to buy an ADC to DVI adapter for the monitor.


Assemble of the Apple Studio Display (17" ADC)

After completing the "dummy" CRT and installation of circuit board therein, I re-attached the mount assembly with it, by placing the edge of the stand tilt base in the bezel channel, as shown in pic 1.

Next, install the video assembly to the neck of the "dummy  CRT" and fasten the nect clamp with a screwdriver (pic 2).

Then returned the video can in its original position (pic 3).

Afterwards, re-install theCRT shroud with screws (pic 4).

Friday, January 22, 2016

Studio Display Mod - Duplicating the Cathode Ray Tube

Despite the revolution of LCD technology bring about production of HD monitors with 4K or even 5K resolutions, some people still concern not only the screen quality per se but also the overall design of a monitor (like me XD). This is one of the articles about modifying an obseleted Apple Studio Display 17" (ADC) to meet present use.


I want to preserve the original look of the Apple Studio Display 17" ADC. However, it is not possible unless the Cathode Ray Tube (CRT) of the display is duplicated.


I made the CRT with a mold. It took me two months to finish it. It could be faster if the Hi-tec 3D printer is use to make it.

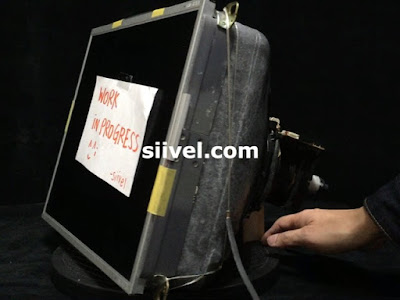
After making the CRT, I attached the LCD panel in front of it.

Duplicating the CRT

After that, I re-attached the metal cover and the arcrylic cover at the back of the CRT.

Re-attached the Covers for the CRT

Work still in progress...

Saturday, January 9, 2016

Studio Display Mod - Blueprint of Protective Skin

Despite the revolution of LCD technology bring about production of HD monitors with 4K or even 5K resolutions, some people still concern not only the screen quality per se but also the overall design of a monitor (like me XD). This is one of the articles about modifying an obseleted Apple Studio Display 17" (ADC) to meet present use.
Those are blueprints of protective skin of Apple Studio 17" (CRT) Display (ADC):

Protective Skin for Apple Studio Display

Protective Skin for Apple Studio Display

Protective Skin for Apple Studio Display

Protective Skin for Apple Studio Display

Protective Skin for Apple Studio Display