Translate

Showing posts with label Modification. Show all posts

Tuesday, April 19, 2016

Studio Display Mod - Finalized

Despite the revolution of LCD technology bring about production of HD monitors with 4K or even 5K resolutions, some people still concern not only the screen quality per se but also the overall design of a monitor (like me XD). This is one of the articles about modifying an obseleted Apple Studio Display 17" (ADC) to meet present use.

After plugging the ADC connector of the Studio Display with the ADC to DVI Adapter, the LCD screen exhibited severe electromagnetic interference...


Electromagnetic Interference on Modified Studio Display
 Electromagnetic Interference on Modified Studio Display

Which meant that image quality will be adversely affected unless the whole ADC cable is rebuild.

Therefore, I switched to the "Plan B": simply split the ADC into 3 separate cords: power, USB and HDMI. 

After switched to "Plan B", the problem of electromagnetic interference was resolved.

Some pictures were captured after finalizing the mod:


Studio Display Mod Finalized Being Plugged with Mac Mini Early 2014


Top View of Studio Display Mod


Interior Enclosure of Studio Display Mod


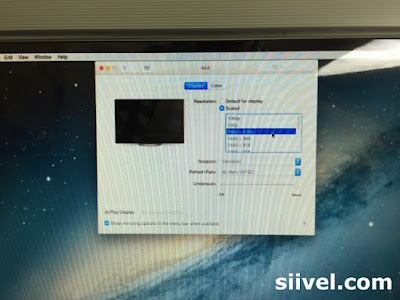
The Optimal Resolution of the Modified Studio Display is 1600x1200

The mod is completed here. The finalized product is cool. The retention of the "dummy" CRT tube and the deflection board in the rear enclosure makes the whole display looked "original", but now it is being plugged with a Mac Mini early 2014 running Mac OS X Yosemite!


Erik Siivel (@siivel.com)
Modder | Producer | Blogger | Youtuber
Email: siiveldotcom@gmail.com


Sunday, January 24, 2016

Studio Display Mod - Assembled

Despite the revolution of LCD technology bring about production of HD monitors with 4K or even 5K resolutions, some people still concern not only the screen quality per se but also the overall design of a monitor (like me XD). This is one of the articles about modifying an obseleted Apple Studio Display 17" (ADC) to meet present use.
There are at least 2 ways to modify the Studio Display: the easier way is to migrate the original LCD circuit board into the studio display. But I dislike this idea not only because there will be 2 lines out (the power cord and the DVI/VGA cord), but also this sacrifices the functions of USB at the right side of the monitor.

Therefore, I adapted another way: cobined the signal, the USB and the power cords into one ADC cord. Then there will be one ADC line out. It would be terrific! However, this associates more scoldering work and higher cost as I need to buy an ADC to DVI adapter for the monitor.


Assemble of the Apple Studio Display (17" ADC)

After completing the "dummy" CRT and installation of circuit board therein, I re-attached the mount assembly with it, by placing the edge of the stand tilt base in the bezel channel, as shown in pic 1.

Next, install the video assembly to the neck of the "dummy  CRT" and fasten the nect clamp with a screwdriver (pic 2).

Then returned the video can in its original position (pic 3).

Afterwards, re-install theCRT shroud with screws (pic 4).

Friday, January 22, 2016

Studio Display Mod - Duplicating the Cathode Ray Tube

Despite the revolution of LCD technology bring about production of HD monitors with 4K or even 5K resolutions, some people still concern not only the screen quality per se but also the overall design of a monitor (like me XD). This is one of the articles about modifying an obseleted Apple Studio Display 17" (ADC) to meet present use.


I want to preserve the original look of the Apple Studio Display 17" ADC. However, it is not possible unless the Cathode Ray Tube (CRT) of the display is duplicated.


I made the CRT with a mold. It took me two months to finish it. It could be faster if the Hi-tec 3D printer is use to make it.

After making the CRT, I attached the LCD panel in front of it.

Duplicating the CRT

After that, I re-attached the metal cover and the arcrylic cover at the back of the CRT.

Re-attached the Covers for the CRT

Work still in progress...

Monday, November 9, 2015

iBook i5 with Mac OSX El Capitan Upgraded

Here's my last article in this blog about upgrading the OS of the iMac G3 i7 to OSX El Capitan:

After that upgrade, everything were running smoothly.

Now it is the turn for my iBook i5. iBook i5 is not my primary system, hence the upgrade was relatively easier. The procedure was the same with that of iMac G3 i7:

Go to Mac App Store -> Download OSX El Capitan -> Launch it -> Wait

One needs to plug the adapter or the Mac won't allow the installation to begin.


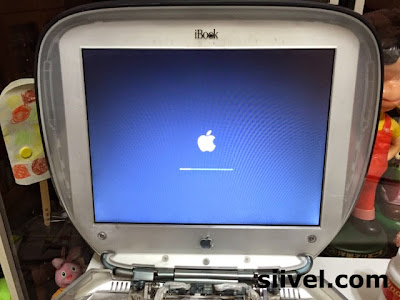
iBook i5 Mac OSX El Capitan Upgrade
The iBook i5 is installing the OSX El Capitan

The installation took about 60-70 minutes.

iBook i5 Mac OSX El Capitan Upgrade
Installation Finished!

iBook i5 Mac OSX El Capitan Upgrade
Now the iBook i5 Comes with a New Operating System.

I haven't made an upgrade video for my iMac G3 i7, but have for this iBook, that is a short video and the URL is:


See you soon!

Written by: Erik Siivel (@siivel.com)
Modder | Producer | Blogger | Youtuber 

Email: siiveldotcom@gmail.com

Friday, November 6, 2015

Installing Mac OSX El Capitan on iMac G3 i7

The Mac OSX El Capitan was issued on 30 Sept 2015. I upgraded this new OS from Yosemite yesterday, however. It is because I have almost 50,000 pictures in my Mac. I need plenty of time to back them up securely before making big changes.

Before the upgrade, I backed up the data on my iMac once in Airport Time Capsule. And then I dragged the iPhoto Library into 2 respective external hard-diskes. I have some problem with my Apple ID, otherwise I would have backed-up those photos on iCloud, indeed. But at this stage, those measures were already secure enough.

The upgrade of the new OS is easy. Just entered into the Mac App Store and download the new OS (for about 20 minutes). After that, double-clicked the downloaded OS and the Mac will do it without any hassle.

Installing osx El Capitan
 Mac OSX El Capitan was being downloaded from Mac App Store.

Installing osx El Capitan
Choose the hard-disk for the installation.

Installing osx El Capitan
The installation took an hour.

The installion took about an hour. After that, the system will restart and the new OS will be ready.

Installing osx El Capitan
Now the new OS is ready.

In fact my iMac G3 i7 is still equipped with a 2.5" SATA2 hard-disk. The start-up speed is very very very slow. Sooner-or-later I will replace it with a SSD.

Written by: Erik Siivel (@siivel.com)
Modder | Producer | Blogger | Youtuber 
Email: siiveldotcom@gmail.com


Thursday, June 4, 2015

iMac G3 Mod - The Side Panel

Just finished making the Side Panel of iMac G3 i7 Version 2.0. Compare with the Version 1, this version has greater connectivity ability.

Apple, Core, G3, i5, i7, iMac, Intel, Mod, Modification, Modify, Project, Upgrade, siivel, siivel.com, Side Panel, USB 3.0, Thunderbolt, FireWire, Mic Jet, 3.5mm Stereo, Gigabite Ethernet, 改, 改造, 改造計劃, 改造計画
(1) Mic Jet;
(2) 3.5mm Stereo Jet;
(3) Firewire Port (could be changed to USB 3.0);
(4) and (6) USB 3.0;
(5) a Thunderbolt Cord; and
(6) Gigabite Ethernet.

Mic and speaker jets are new features of Version 2.

If you still have vintage devices like iSight Camera, iPod Gen 1-3 ..., you still need a FireWire Port, or just dropped it.

As there is no "female" Thunderbolt Port available in the market (unless being disassembled from a Thunderbolt device), the Thunderbolt Jet has no choice but to be built this way.

Related Articles:

iMac G3 Mod - What is iMac G3?
iMac G3 Mod - iMac G3 "i7": an iMac G3 with i7 CPU


Written by: Erik Siivel (@siivel.com)
Modder | Producer | Blogger | Youtuber 
Email: siiveldotcom@gmail.com


Thursday, May 28, 2015

iMac G3 Mod - iMac G3 "i7": an iMac G3 with i7 CPU

The original meaning of iMac G3 refers to the all-in-one desktop computer produced by Apple computer during 1998 to 2003 with a PowerPC G3 processor.

As a product of more than a decade. What can we make use of it in 2015?

(1) it is still a perfect tool for word processing.

(2) it can be used as a music player.

Anything else?

Honestly speaking, even if its hardware is still in good condition, its specification is unfit to meet our needs these days. Nowadays, computers need to handle more complex tasks, such as, backup data of mobile devices, edit and play HD movies, storage of photos, entertainment... Some tasks even need to implemented wirelessly, like sending media messages, syncing data with iCloud, and so on.

If we still want it to be our perfect companion, why don't we upgrade its hardware to meet this goal? Accordingly, we need to treat the iMac G3 housing as an ordinary computer case, in which the elements inside would be replaced and upgraded with latest ones.

iMac G3 "i7" is an integration of old with new elements. We replace the PowerPC G3 logicboard of iMac G3 with an Intel i7 logic board. The outlook of the iMac G3 has no change, but there is "a big change" inside. Instead of calling this modified machine iMac G3, we name it as "iMac G3 i7".

Up to this moment (March 2015), the iMac G3 i7 could be upgradable to the highest possible specification of 4GHz Intel Quad Core i7 with 32GB memory. 


All-in-one, Apple, iMac, G3, Modification, Modify, i7, Intel, Core, PowerPC G3, Siivel, siivel.com,

Related Articles:

iMac G3 Mod - What is iMac G3?
iMac G3 Mod - iMac G3 "i7": an iMac G3 with i7 CPU


Written by: Erik Siivel (@siivel.com)
Modder | Producer | Blogger | Youtuber 
Email: siiveldotcom@gmail.com


Tuesday, January 6, 2015

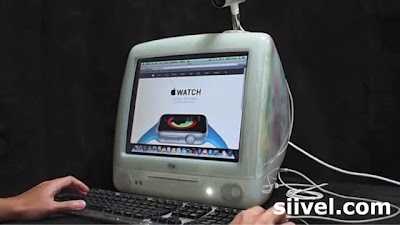
iMac G3 i7 Mod Video - 10000 Views Attained

The "iMac G3 Mod i7 Mod" Video was uploaded in last April. Today I am happy to announce that 10000 views was reached, in less than a year. It is a milestone of our work done. I would like to express my gratitude towards all people who have watched this video, in particular, who liked this video, who gave comment to this video, and the subscribers of our channel.

10.10, Apple Watch, iMac, G3, i7 Modify, Modification, Intel, Quad Core, iPad, iPod, iStat Menus, Keyboard, Mac OSX Yosemite, Mouse, SATA, SSD, Wireless, 改, 改造, 改造計画, 改造計劃,

If you have watched other related videos of mine, you might find that I have fine-tuned this computer, which include:

(1) adjusted the viewable area of the LCD screen to about 13 inches so that it look much alike the original CRT screen;

(2) install the latest Mac OSX Yosemite for this iMac G3 i7;

(3) install the iStat Menus to show more performance information of this machine; and

(4) connecting it with other Apple devices i.e. Wireless Mouse and Keyboard and iPhone 6 and iSight Stand Alone Camera.

10.10, Apple Watch, iMac, G3, i7 Modify, Modification, Intel, Quad Core, iPad, iPod, iStat Menus, Keyboard, Mac OSX Yosemite, Mouse, SATA, SSD, Wireless, 改, 改造, 改造計画, 改造計劃,

If I have another chance to make a Version 2.0 video, It would includes all those changes, besides, I would also:

(1) upgrade the start-up disk from SATA To SSD;

(2) show its connectivity with iPod, iPad and Apple Watch;

(3) activate more applications to demonstrate its performance of multi-tasking; and

(4) improve the fluency and skill of my presentation (^.^).


Written by: Erik Siivel (@siivel.com)
Modder | Producer | Blogger | Youtuber 
Email: siiveldotcom@gmail.com

Thursday, December 18, 2014

iBook Clamshell Mod - Connecting the LCD Panel with the Main Body

This is one of the passages about the iBook G3 Clamshell modification project, of which a logicboard of Intel i5 was being installed into the classic Apple iBook G3 Laptop.
Instead of using a 800x600 resolution LCD panel, we replace it by a new one with 1024x768. It is because a 800x600 LCD couldn't show all contents of Mac OSX Yosemite.


1024x768, 800x600, Apple, Clamshell, G3, Haswell, iBook, Intel, Core i5, LCD, Macbook Air, Modification, Modify, Siivel, siivel.com, クラムシェル, シェル, 改, 改造, 改造計画, 改造計劃,

After we install the new LCD, we rearrange the wires as shown in the above picture. Then we attached the LCD with the main body of the iBook.

1024x768, 800x600, Apple, Haswell, iBook, Clamshell, G3, Modify, Modification, クラムシェル, シェル, Intel Core i5, LCD, Macbook Air, 改, 改造, 改造計画, siivel.com, Siivel,

Now, the LCD was connected to the body of iBook. And it was booting Mac OSX Yosemite.

We have a video about this iBook G3 booting Mac OSX Yosemite:

http://youtu.be/X1wdGIpPuk4

Thursday, November 27, 2014

iBook Clamshell Mod - Yo-Yo Adapter Modified

The adapter is very crucial for iBook modification because we need to power on the iBook to continue our work, or our work will merely stay in the theoretical level. Today, the adapter is done ! (^^)


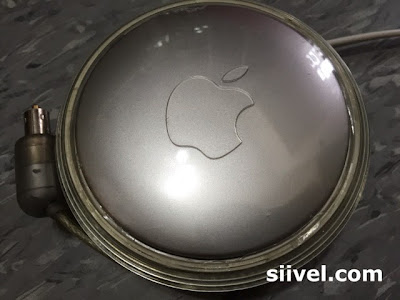
This was the original outlook of the Apple adapter.

After we modified it and polished it, it becomes:

Apple, iBook, Clamshell, G3, iBook G3 i5, Modification, Modify, Yo-Yo Adapter, クラムシェル, シェル, 改, 改造, 改造計画, Siivel, siivel.com,

 (Actually no change in outlook, but has a change in output voltage from 24V to 14V ^^)

The below photo is showing the original outbook of the bottom of the adapter:

Apple, iBook, Clamshell, G3, iBook G3 i5, Modification, Modify, Yo-Yo Adapter, クラムシェル, シェル, 改, 改造, 改造計画, Siivel, siivel.com,

After modification, it becomes:

Apple, iBook, Clamshell, G3, iBook G3 i5, Modification, Modify, Yo-Yo Adapter, クラムシェル, シェル, 改, 改造, 改造計画, Siivel, siivel.com,

 (Also no change in outlook :-D)

However it seems unavoidable to have cracks on the shell of the adapter, like the pic below ... as it was crack-opened by us previously. So if anyone of you knows the way to open the Yo-Yo adapter beautifully, please tell us by mail.